
RLN36 has 8 alarm inputs for sensors like motion detectors and magnetic sensors and 4 alarm outputs for sirens, buzzers, alarm systems, etc.
Applies to: RLN36
Please refer to the below video to set up the Alarm in and out feature for RLN36 NVR.
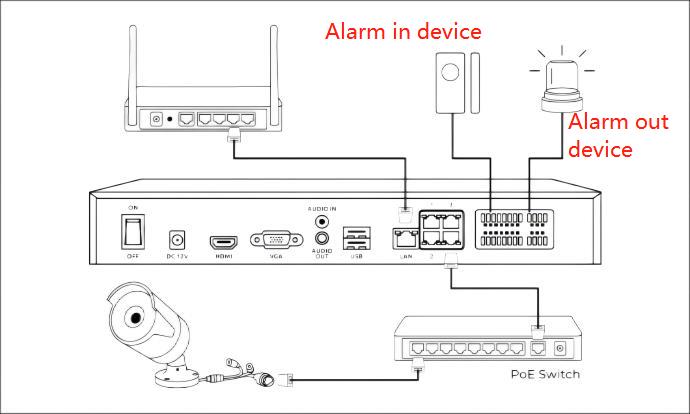
Please make sure the devices are connected in the correct way.
For the operating principle of the alarm in/out, please refer to the introduction to Reolink RLN36
Step 1. Click the Settings button and go to Surveillance > Alarm Input Settings.
Step 2. You can choose a channel (from the 8 channels), name the channel, and set the default state type (Normally close or Normally open).
If you set the Type as Normally close, it means that the alarm-in device is under a normal condition when it is close. But when it is open, it signifies an abnormal condition and will trigger an alarm.
Step 3. Back to the Surveillance page and click Alarm Output Settings.
Step 4. On the Alarm Output Setting page, you can choose a channel (from the 4 channels), name the channel, set the default state type (Normally close or Normally open), and set a delay (5/10/20 seconds).
Step 5. Associate the alarm in device with the alarm-out device.
Go back to the Surveillance page and click the Daily Schedule.
Step 6. Choose an alarm input channel and enable the current channel alarm input.
You can customize IP Camera Alarm Schedule, Alarm Input Schedule, and Timer Schedule.
By setting the IP Camera Alarm Schedule, you can associate the camera in the selected channel with the alarm-out device.
Similarly, setting the Alarm Input Schedule will associate the alarm-in device in the selected channel with the alarm-out device.
The alarm-out device will be triggered according to the Timer Schedule you set.